Showing posts with label diy cosmetics. Show all posts

Tuesday, July 2, 2013

Week 7: Replace Bug Repellent


Not very many people know that there are many essential oils that are just as good or better at repelling bugs than commercial insect repellents. Some include: Citronella, Clove, Lemongrass, Rosemary, Tea Tree, Cajeput, Eucalyptus, Cedar, Catnip, Lavender and Mint. Essential oils in the citrus family are all strong bug repellents. Butterfly Express, the company I buy my oils from, sells an oil blend called "Away" that has many of those ingredients. I have two recipes for bug repellent that I prefer and I will share them both with you. I made both of these at a recent cosmetics class I taught.

Extra Strength Bug Repellent

4oz Distilled water
5 drops of each: citronella cedarwood, clove, cinnamon berry, catnip, eucalyptus, peppermint (you can buy this formula from Butterfly Express, it's called "Away")
5-10 drops of lavender

This formula doesn't smell as good in my opinion (although many people like it) but is extra strength.

Thieves Bug Repellent

4oz Distilled water
5 drops of each: rosemary, clove bud, cinnamon, eucalyptus, lemon, orange sweet, lavender

This is the formula I took with me in Yellowstone. I didn't get a single bite and neither did my kids. The only one who got bit was my husband who didn't use the bug spray. I prefer this formula to the extra strength because it smells so yummy. However, it's not as strong as the first recipe. But when I've used it, it has worked perfectly. So as long as your not in the deep woods, this should be more than enough protection.

Week 6: Replace Sunscreen


Have you ever read the ingredients in sunscreen? Yep, me neither...until recently during my Make-over challenge. Sunscreen is one of the most chemical-laden products we put on, and we smother our kids and babies with it! Replacing sunscreen is a no-brainer, as long as there is a natural option that works. I have found a wonderful formula over at Wellness Mama's blog that really works. I took the sunscreen recently to scout camp and our vacation in Yellowstone and I didn't burn at all. I am not a fan of sunscreen in general, and don't put it on on a daily basis. But I do like to put sunscreen on when I'll be in the sun all day, at the pool or camping. This formula is the perfect sunscreen for me. It's light enough that I still get sun, but just enough coverage so that I don't burn.

Natural Sunscreen Bars

(From Wellness Mama's Blog)
1 c. coconut oil 
1 c. shea butter, cocoa butter or mango butter (or a mix of all three equal to 1 cup)
1 c. beeswax (can add an extra ounce or two if you want a thicker consistency, which leaves less lotion on the skin when used)
2 tablespoons (or more) of Zinc Oxide
optional: Vitamin E oil to preserve. I added 1 tsp vitamin E oil for  this recipe made with 1 cup of each ingredient)
optional: a few drops of vanilla or essential oil for scent (do not use citrus oils!)

Combine all ingredients (except zinc oxide and essential oils if using) in a double boiler, or a glass bowl over a smaller saucepan with 1 inch of water in it. Turn the burner on and bring water to a boil. Stir ingredients constantly until they are melted and smooth. Remove from heat and add the zinc oxide powder and  essential oils. Gently stir by hand until essential oils are incorporated.

Carefully pour into molds or whatever you will be allowing the lotion bars to harden in. I used silicon baking cups, though any mold would work. This recipe exactly filled 12 silicon baking cups when I made it. Allow the lotion bars to cool completely before attempting to pop out of molds.

They can be stored at room temperature or in the fridge or freezer for longer term storage. Keep below 80 degrees or they will melt! Adjust coverage to your needs and be careful not to burn while determining how long you can spend in the sun with these.

Sunday, June 9, 2013

How to Make Rosewater

Making distilled Rosewater is easier than I ever thought. I have rose bushes all over my yard, so getting rose petals was the easy part.

You start by making a homemade distiller. Find a large pot with a convex lid. Place a brick in the center. Fill the bottom of the pan with water. Place a bowl on top of the brick. Put the lid on upside down so that as the water steams, the condensation will pool and drop into the bowl. Bring the water to a boil and heat until the water boils dry. (An additional, optional step is to add ice to the top of the lid to speed the condensation.) 

Add rose petals to the water, but make sure not to have the waterline above the brick. 

After the water has all boiled dry, turn off the heat and let it cool. Be careful of the steam! 

What collects in the bowl is distilled rose water! You can also do this with a variety of flowers and herbs! 


Sunday, June 2, 2013

Week 5: Replace Deodorant

If you feel anything like I did, the last thing you want to try is natural deodorant. I am one who wears clinical protection deodorant everyday and am very self-conscious about smelling bad. I have tried all sorts of different store bought "all-natural" deodorants only to be very disappointed with the results. I can honestly say I have found a natural deodorant recipe that has changed that.

How I found the recipe
I started off with a base recipe found at one of my favorite blogs, Wellness Mama. If you haven't checked out her blog, you should. You can spend weeks reading her helpful blogs. Her deodorant recipe had so many positive reviews, I decided it was worth a try. I did add a few tweaks after reading some of the comments. I decreased the amount of baking soda to prevent irritation and added witch hazel to soothe, heal and keep the armpit dry.

The test
I tested the deodorant in two situations that I sweat the most. Test one included hot conditions and exertion. I tried it on a Saturday, knowing I would be spending the day in the heat weeding my garden. I was so impressed that at the end of the day, my armpits were still dry and smelled wonderful. Test two involved social anxiety...I applied it the next day, knowing that I would be speaking in church. I usually sweat the most when I am nervous. By the end of the day my armpits were still sweet smelling and my arms only got slightly moist when I was nervous (nothing like normal with the clinical versions) and quickly dried. I was also wearing a tight undershirt that always makes me sweat really bad....but not this time.

It feels great on too. I was worried it would be greasy and drip onto my clothes. It is completely absorbed into the armpit. It only leaves a light residue. It is amazing that this natural deodorant actually works better than store bought, high strength clinical versions. Not only does it work better, but the ingredients are so natural that you could eat it...although I DO NOT recommend that. If you think about it though, if you wouldn't ingest it, why would you smear it into a delicate area like your armpits everyday?


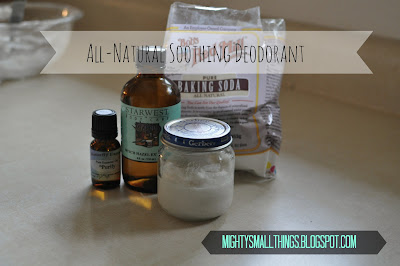
All-Natural Soothing Deodorant Recipe
1/2 c. Coconut Oil
1/2 c. Arrowroot
1/4 c. Pure baking soda
1/8 c. Witch Hazel
20-30 Drops Essential Oils (I recommend tea tree, lemon and lavender)

Mix all ingredients until a smooth consistency is reached. Store in empty baby food jars or small mason jars. Makes enough to fill two baby food jars. Apply with hands after showering.


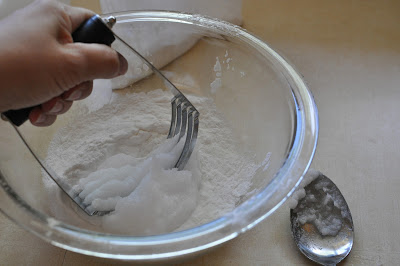
Combine all ingredients with a pastry mixer.

Finish mixing with a spoon.

The final consistency should look like this.


***An update: When making the switch to natural deodorants there is a transition period while the harmful chemicals from your store bought deodorants are coming out of your skin. You may find that you temporarily sweat more or break out a little in your armpits (it should be painless, if you break out in a rash, discontinue use until the rash is healed and read the advice below.) After the adjustment period, you will actually sweat less than you did before because your sweat glands are no longer clogged and don't have to overproduce sweat to compensate. Remember that sweat is your body's natural detoxing and cooling method. Why mess with God's design, He's way smarter than us! I know that culturally we have issues with sweating. But don't worry, your sweat glands will adjust and you will find a happy medium. And even better, you won't smell at all! Most importantly though, you won't be putting harmful chemicals on your body anymore. That is so worth it!

With that said, I have been using this deodorant with fantastic results for two months now and it is still working wonders. In fact, it is so effective, I can usually go 2 days before needing to reapply! There are a few things I have learned in the process though. Because baking soda is very base, it can cause a little irritation after prolonged use (this irritation is not to be confused with the initial detoxing period which occurs when you first switch over.) This is easily remedied by first putting on a very thin layer of jojoba oil and then applying the deodorant. I began to get some irritation to the point that I had to discontinue use of the deodorant. After I learned of this trick, I am back to wearing the deodorant with absolutely no issues whatsoever and it's still just as effective.

If you have tried this trick and it doesn't take care of the irritation, I found another non-irritating formula that works. It is not as strong, and I found I did have to reapply on really hot days in the sun. But, I promise, it's the most effective baking soda free homemade deodorant you'll find.

*Bonus* Natural Deodorant for Sensitive Skin

1/4 c. Milk of Magnesia (flavorless)
1/8 c. Coconut Oil
1/8 c. Arrowroot Powder
1/8 c. Redmond Clay
Aloe Vera Gel as needed to reach desired consistency
Essential Oils for fragrence

Have any questions or fabulous results? Tell me about it in the comment section.

Thursday, May 30, 2013

All-Natural Mascara

Let's be honest
Most people who are looking to simplify and detox their lives, aren't usually the type to wear a lot of make-up. For this reason, it is extremely hard to find a good, tried-and-true recipe for mascara. Take my word for it, and let me save you a lot of money and frustration and tell you that you will not find a better recipe than these two I'm about to share with you. Having said that, these formulas just can't compare to store bought mascaras. All the things we love about mascara (smudge proof, long shelf life, thickening and lengthening, good coverage, etc.) are all made possible by chemicals. Look at the ingredients in even organic "all-natural" mascara and you will find things you cannot pronounce. These formulas of mine are truly organic, affordable and don't require any expensive equipment to make. That's the upside. The downside is that they really aren't suitable for daily wear. They are perfect for a night out on the town or for special occasions (although for weddings and church I would stick to waterproof so you don't cry your mascara off.)

A battle I'm willing to lose
This is in no way a defeat, but after all the research I've done I have come to the conclusion that I'm okay with store bought mascara. In all reality, you're probably not getting many chemicals into your bloodstream through your eyelashes. It's really not that big of a deal. But, if it's a big enough deal to you, or you just want to save money and make your own, I'll give you two different formulas that are as good as it gets without the chemicals and preservatives.

How I came up with the formulas
I tried countless mascara recipes and spent dozens of hours in the kitchen during my search. I started with a recipe I found on Pinterest that called for cocunut oil and beeswax. It was so greasy and smeared so bad that I wasn't happy with it. After trying literally EVERY recipe on the internet and after more research and experimentation, I finally came up with two recipes that are worth sharing.

Depending on your experience and what you're ready to try, one is simple, fast and a cheap combination. It's pretty foolproof and the ingredients are easy to find. It's not as hardy and long-lasting, but awesome for it's ease of making. The second recipe is hard to make, a little more expensive (not much) but pretty smudge proof. If you are looking for a waterproof version, you will have to buy it. As I've said, unless you are a professional make-up formulator (and use chemicals and fillers in the process) you'll be hard pressed to find a better homemade recipe than this one.

A word of caution with the second recipe. Do not attempt if you aren't experienced in making cosmetics or baking in general. It is a hard recipe to get just right. I messed up a batch myself when I first attempted it. I tried to make the instructions foolproof, but there is still room for error. Cosmetic making is really an art. It takes patience and dedication. It is totally worth the effort and patience though!

A word about the beneficial ingredients
Castor Oil has been known to thicken lashes and help them grow. The Aloe Vera soothes and nourishes the lashes. And the witch hazel helps to seal and dry the lashes so the mascara stays in place. The Olive oil in the second formula nourishes the lashes to thicken them.

Lash Growing Mascara 

1 capsules of Activated Charcoal
1/2 tsp Aloe Vera gel (organic, no additives)
1/4 tsp Witch Hazel
2-4 drops of 100% Castor Oil

Make sure you buy pure, organic ingredients with no preservatives or additives or your mascara will be no better than store bought. Put all ingredients together. Mix well until all clumps are gone. 


I usually put a few coats on, let it dry and then put a few more coats on. I calculated that each batch only costs around .50 cents to make! You can't beat that! Also, keep in mind this has no preservatives, so it will need to be replaced often. This formula should make enough for only 1-2 applications so that you remember to replace this often. I would make a new batch weekly and be sure to use a sanitized container to store it in.

All-day Nourishing Mascara

1/4 tsp. Olive Oil
1/8 c. Aloe Vera Gel
1 tsp. Arrowroot
1/2 tsp. Beeswax
5 caps Activated Charcoal (or black mica)
1/2 tsp. Rosewater (or distilled water)
1/4 tsp. Apple Fiber with Apple Pectin
1/4 tsp. Caster Oil
1/2 tsp. Vegetable Glycerin
pinch of fine sea salt
few drops of Vitamin E (for preservation)
5 drops of Grapefruit Seed Oil (for preservation)
Witch hazel as needed

In a double broiler melt Beeswax, Aloe Vera Gel, Olive oil, Charcoal, Apple fiber, Salt, Castor oil and Glycerin. Stir continually until all clumps are gone and beeswax is incorporated. In a small bowl mix Rosewater and Arrowroot until fully dissolved. Click here for my rosewater recipe. Slowly add arrowroot mixture to the heated mixture, stirring continually. Add vitamin E and grapefruit seed extract. Scoop into a glass bowl wide enough to fit an immersion blender. Blend until a smooth consistency is reached. Let cool. It will look pretty gelatinous at this point. Don't worry, it will look much more normal after it sets. Pour into container.

Let the formula sit for at least 2-4 days before trying it out. I know it will be hard, but the final step includes allowing the formula to set. If you skip this part, you will have a gooey mess on your hands and the mascara will be ruined. After the 2-4 days check consistency. If it is too solid to load unto the brush applicator, add witch hazel to thin. For extra lash growing power, add a few drops of caster oil (not too much or the mascara will smear.) Last of all, add a drop or two of glycerin. This part is really an art. It might take a few trial and errors to get the consistency you prefer. Just keep in mind, the more oil you use, the higher the chance of smudging.

The Salt, Vitamin E and Grapefruit Seed Oil do act as natural preservatives, but I would still make a new batch frequently. This stuff does not have a long shelf life! 

Try it, and let me know how it works for you!

Looking for more awesome diy cosmetic recipes? Check out my Small & Simple challenge which includes things like deodorant, face moisturizer, soap and sunscreen.


*As with all cosmetics, use with care. Do not get this in your eyes. Avoid if you have any allergies to the ingredients. Make at your own risk. I am not a physician, just a stay-at-home mom trying to save money and make all-natural products. What works for me may not necessarily work for you.

Week 4: Replace Soap

As part of my Small & Simple Make-over challenge, I bring you one of the simplest make-overs yet---all-natural soap.

First and foremost, let me tell you a few tricks and tips when it comes to soap. We use soap for many things when it comes to hygiene, soap for hair, body soap, hand soap, etc. When it comes to getting clean though, many of us have the wrong idea of how to go about it. We use soap to strip the oils and dirt from our skin, leaving it dry and dull. Instead we should be exfoliating to remove dead skin cells and dirt. That is what gives you a healthy glow...not stripping your skin of it's natural oils with harsh soaps. So, my first advice to you would be to invest in some quality rags and loofahs.

My favorite cleansing rags are made by Norwex. If you want to know more about them, click here. I am not a consultant for their company, and they don't pay me to say this, but I absolutely love them. They are high quality microfiber cloths with silver in them. The silver in them inhibits and kills bacterial growth. Because of this they do not need to be washed often. I usually wash mine about every 2-4 weeks. Before that, I was getting a new washcloth for my face every day!

Not only that but the silver kills the bacteria on your face (or whatever surface you're cleaning) so it doesn't require soap. Yes, that's right! No more soap or cleaners are needed! I have been using mine for a year now and have not lost my enthusiasm about them. In essence with these cloths you can wash your face and body with just water. Don't worry, you'll be squeaky clean and you won't have your body's oils stripped off. You will just be left with clean, exfoliated skin.

For deeper, full body exfoliation, the best thing out there are Japanese cleansing cloths called Salux. They are what ballerinas use to get glowing skin. They are inexpensive and easy to purchase off Amazon. Because of the material they are made with, they also do not need to be cleaned frequently. After using them your skin feels so amazing and smooth! They provide the perfect amount of deep exfoliation without irritating your skin.


Although these rags will eliminate the need for most soap, there are times when you just need a good soapy lather. When washing your hands for example, it's good to soap up. For that, I use Dr. Bronner's Liquid Castile Soap, which is bar none the best natural soap you can find. It has no harmful sulfates or parabens that make normal soaps so harmful. It comes in a large concentrated bottle. I only use a tbs. of it per soap dispenser, so it goes a long way! Occasionally, when I need a good lather in the shower, or when I shave, I will use this formula. Here's a few recipes I enjoy:

Soothing Body & Shaving Wash

1 Foaming soap dispenser
1 Tbs. Dr. Bronner's Liquid Castile Soap
1-2 Tbs. Olive oil
Fill with distilled water
Optional: Essential oils for fragrence


Deep Cleansing Hand Soap

1 Foaming soap dispenser
1 Tbs. Dr. Bronner's Liquid Castile Soap
1 Tbs. Castor Oil
1 Tbs. Glycerin
Fill with distilled water
Optional: Essential oils for fragrence


Gentle Hand Soap

1 Foaming soap dispenser
1 Tbs. Dr. Bronner's Liquid Castile Soap
1 Tbs. Olive oil (or Grapeseed oil)
1 Tbs. Glycerin
Fill with distilled water
Optional: Essential oils for fragrence


When it comes to eliminating and replacing the soap in your house, it is much easier than you could imagine and it will save you so much money. Not only that, but your skin will thank you! My skin has never been softer...with the exception of when I was a baby :). You'll love it.

If you have any questions, or just want to share your awesome experience with no-soap, leave a comment below.

Friday, May 24, 2013

Week 3: Replace Bronzer

For week 3 of my Small & Simple Make-over Challenge, I've decided to swap out one of my most used make-up items: bronzer. I don't use foundation, so bronzer is all I use for color. I was happy to find that bronzer is one of the easiest cosmetics to make on your own. I found the base for this recipe over at one of my favorite resources, Wellness Mama. Not only does it work wonderfully, but it smells delicious! I was worried about how it would feel on, but it goes on very well. If you already have a moisturized face, it works even better.


Chocolate Cinnamon Bronzer
Cocoa Powder
Cinnamon
Arrowroot Powder
Hibiscus Flower Powder

Start with small amounts and blend to make your perfect shade. Hibiscus flower adds more pink, cocoa powder adds a deep brown and cinnamon is a nice neutral brown.

Sunday, May 19, 2013

Week 2: Replace Leave-in Conditioners

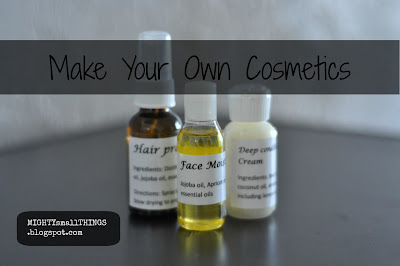
As part of my Small & Simple Make-over Challenge, for Mother's Day I decided to make some homemade beauty products for my mothers. I thought they turned out pretty great. I made deep conditioner creme, hair protector, face moisturizer, bath salts and mascara. I basically spent two solid days in the kitchen making all the different recipes. It was really fun and I think that the finished products turned out awesome, with the exception of the mascara which still needs some tweaking.

I started off collecting all the trial sized bottles in my house that I could find, removing labels and cleaning them out.


Then I scoured the internet for recipes. Many of the recipes required tweaking to get the perfect consistency. One of my favorite sources for recipes is Wellness Mama. One of the recipes I included came from Week 1 of the challenge, Face Moisturizer. Overall, I was very pleased with the end results.

Because this is a weekly challenge, I will share only one of my favorite recipes and share the rest as weeks follow.

This week's is a lovely Leave-in Conditioner/Heat Protectant. I use this and I love it. It leaves your hair feeling like silk. The jojoba in it conditions your hair and the grape seed oil protects it from high heat and sun damage. This stuff is amazing. You can throw all your other similar products away, this stuff works better! And it has no harmful chemicals or damaging alcohol. Read your heat protectant's label, it's amazing the chemicals we put on our hair! One note of caution, this stuff goes a long way. Only a few sprays is needed at the ends of your hair. Too much, and you'll look like a grease-head. I made the mistake of using too much the first time, as I am used to dousing my hair with product when I was using the chemical-laden varieties. So good news, even a small bottle will last you forever!

So you can get an idea of what it can do for your hair, I did a before and after shot. The before is my hair drying with no product so you can see my natural texture is frizzy and wavy. The after shot is after curling my hair with ONLY the hair conditioner I made on it. It makes your hair so soft and shiny. If you want extra volume and texture, you can add Epsom salt to the mix (it will give your hair the beachy look, so don't use it if you don't want that result.)


Leave-in Conditioner/Heat Protectant 

For Dry/Thick Hair
Fill bottle 3/4 full of distilled water
1/8 part Grapeseed oil
1/8 part Jojoba oil
Essential oils for fragrance (optional)
Directions: Spray on ends of wet hair. Start sparingly, add more as needed. Style as you wish.

For Fine/Thin Hair:
Fill bottle 7/8 full of distilled water
1/8 part Grapeseed oil
Essential oils for fragrance (optional)

For Salon Grade Styling Tools (425 to 510 degrees):
Substitute Avocado oil in place of grape seed oil.

Have you seen my other super simple recipes? Click here for more.

Thursday, May 9, 2013

Week One: Replace Moisturizers


As part of my goals to a more natural, homemade life, I have decided to take on one small project a week and share it on this blog. This week's project involves replacing my store bought lotions. I live in a dry climate, so lotion is a must.

Ever read the ingredients label on your lotion bottle? Lotions are filled with so many fillers and chemicals. Food is a no brainer when it comes to removing toxic chemicals from your home, but what about the lotions you're putting on your skin, the largest organ of your body?

In search for a natural lotion, I have experimented with several different concoctions and recipes. I wanted to find a lotion alternative that wasn't too greasy or sticky and really worked. Coconut oil is one that is highly recommended on the internet. I found it was too greasy. After a little experimentation, I found a good combination that works with my skin and it's so simple and natural! I chose this recipe for the first thing to try because it is so simple and easy you don't have to spend a lot of time or money.

Simple Oil Moisturizer

You'll need:
1 empty bottle
2/3 part Almond oil
1/3 part Jojoba oil
Essential oil

I buy my oils from Butterfly Express, but any organic oils will work. Add the oils, then add a few drops of your favorite essential oils for fragrance. You can do less jojoba, since it is so expensive. But I have found any less than a 1/3 part jojoba and it's not as moisturizing, but it still works.

Depending on the type of essential oil you add, this is gentle and effective enough to use as face moisturizer.

If you are feeling ambitious, and you want a thicker, more lotion-y type of moisturizer here's the easiest recipe out there. It doesn't have any water in it, so it is a thicker, body butter type of moisturizer. Without water you don't need to worry about preservatives, so that's a good thing.

Natural Healing Butter

1/2 cup Grapeseed oil (you can also use olive oil or almond oil)
1/4 cup Coconut oil (to omit, just use a 1/4 c. more grapeseed oil)
1/4 cup Beeswax (use less if you want a thinner consistency)
Optional: 1 teaspoon Vitamin E oil
Optional: 2 tablespoons Shea Butter or Cocoa Butter
Optional: Essential Oils

Melt all ingredients except vitamin E and essential oils in a double broiler. Heat until completely melted, stirring to incorporate all ingredients. Once all blended, remove from heat and add vitamin E and essential oils. Pour into glass jars (baby food jars are perfect) while still liquid. Makes enough to fill 3 baby food jars.

If you want a moisturizer specifically for your face, here is the formula I currently use:

Face Serum

1 part Jojoba oil
1 part Apricot oil (Sesame oil, Almond oil or Grapeseed oil also work)
Optional: Essential oils 1-5 drops (For my sensitive, acne prone, combination skin I use Lavender, Thyme, Tea Tree, Geranium and Carrot Seed)
Glass 1 oz. dropper bottle
  • Essential oils for Normal skin: German Chamomile, Lemon, Geranium, Fennel, Lavender, Jasmine, Rose, Neroli, Frankincense, Carrot Seed
  • Essential oils for Dry skin: German Chamomile, Lavender, Calendula, Sandalwood, Geranium, Patchouli, Rose, Rosemary, Neroli
  • Essential oils for Oily skin: Cedarwood, Geranium, Clary, Lavender, Ylang-ylang, Lemon, Peppermint, Calendula, Frankincense, Patchouli, Sandalwood, Juniper, Grapefruit, Rosemary, Neroli
  • Essential oils for Mature skin: Rose, Geranium, Myrrh, Patchouli, Lavender, Citrus, Frankincense, Neroli, Fennel, Clary, Rosewood, Sage, Cypress, Sandalwood, Carrot Seed, Sea Buckthorn Extract
  • Essential oils for Acne: Thyme, Tea Tree, Eucalyptus, Geranium, Grapefruit, Rosewood, Rose, Lavender, Clove (use sparingly), Jasmine, Sandalwood, Lemon, Patchouli, Chamomile
Don't go out and buy all these oils, just pick one or two oils that match your skin type. Add the oils to the bottle and shake. It's that easy!

Want more info? Here are some amazing resources about making your own serums:
How to Make Your Own Face Serum
What is a Facial Serum?
7 Natural Secrets That Cure Acne

Try it! And if you like it, leave a comment about your experience.